


Fifty Years Ago: Apollo 12 on the Moon — ‘Whoopie!!’
Shortly after re-emerging from the backside of the Moon after entering lunar orbit, the Apollo 12 astronauts turned on their color TV camera and treated viewers on the ground to a 33-minute guided tour of the surface as they made their first pass across the Moon’s front side. Commander Charles “Pete” Conrad, Command Module Pilot Richard F. Gordon and Lunar Module Pilot Alan L. Bean excitedly described the lunar features as they flew over them for the first time, right up to the terminator, when it became too dark for the TV camera. Conrad commented that even in darkness they could make out features on the Moon, as well as on their Lunar Module (LM) Intrepid thanks to Earthshine. They then settled down to a nice meal, accompanied by some music they brought along before going behind the Moon to start their second orbit.
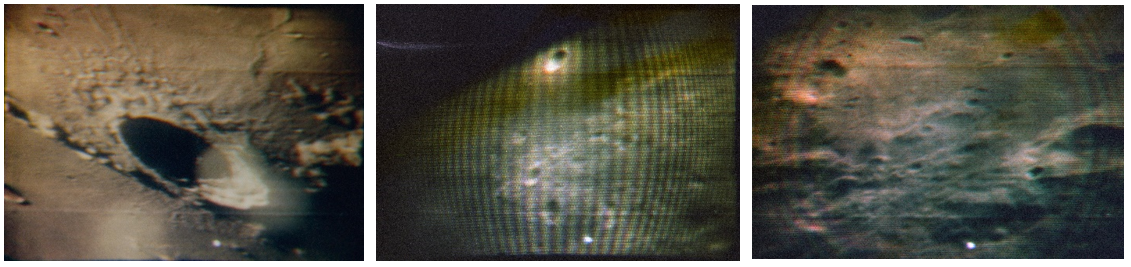
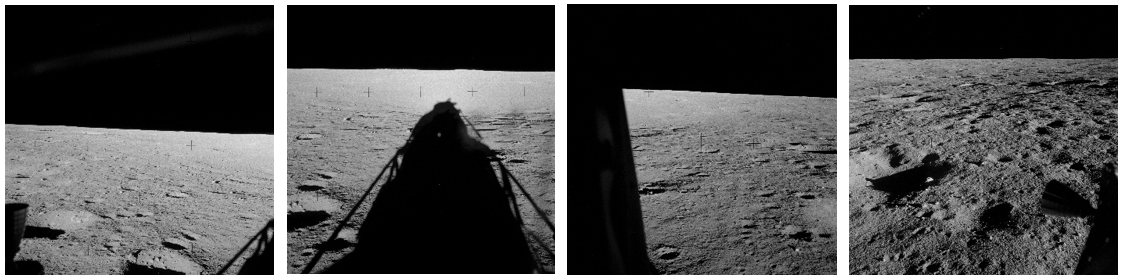
Three stills of the lunar surface from the TV downlink during Apollo 12’s first orbit around the Moon. Left: Crater Eratosthenes. Middle and right: Two view of the Sea of Serenity.
After an uneventful second pass on the front side, Apollo 12 disappeared behind the Moon again. During the backside pass, the crew fired the Service Module’s Service Propulsion System engine for 17 seconds to change their orbit to a more circular 76 by 62 miles. In preparation for upcoming activities, the astronauts pressurized the LM during the third revolution and opened the hatches just before disappearing behind the Moon to begin their fourth revolution. Conrad and Bean reactivated Intrepid to complete communications checks with Gordon in the Command Module Yankee Clipper. Checks complete, Conrad and Bean returned to Yankee Clipper and deactivated Intrepid, closing the hatches between the two spacecraft. They settled down to dinner as they went around the backside of the Moon to start their fifth revolution and then began their first night’s sleep in lunar orbit.
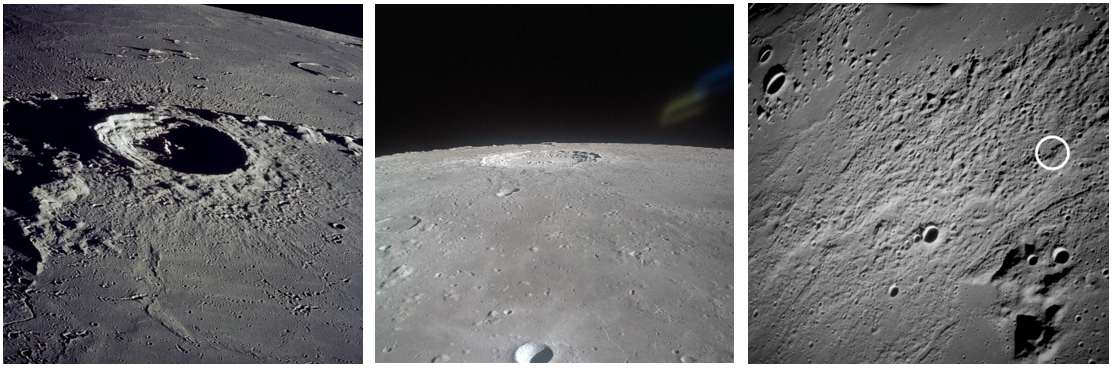
Left: Crater Eratosthenes from Apollo 12. Middle: Oblique view of Crater Copernicus, located north of Apollo 12’s flight path. Right: Image from lunar orbit of the Fra Mauro highlands, the proposed landing site for Apollo 13 (inside white circle).
To awaken the crew, mission control radioed up “Reveille” during the spacecraft’s ninth revolution around the Moon, just prior to loss of signal. One early task for the day, once they returned to the Moon’s front side, included taking photographs of the Fra Mauro highlands area, the proposed landing site for Apollo 13. Then, Conrad and Bean donned their spacesuits and began preparations to enter and reactivate the LM in preparation for separation and landing. As an important task in that preparation, they extended and locked Intrepid's landing legs.
Undocking and separation of Intrepid from Yankee Clipper occurred on the 13th revolution, with Gordon providing color TV of the event. Gordon fired Yankee Clipper’s Reaction Control System thrusters to separate from Intrepid. Then, while behind the Moon, Conrad and Bean fired the LM’s Descent Propulsion System (DPS) engine for 29 seconds to complete the Descent Orbit Insertion (DOI) maneuver to lower the low point of Intrepid’s orbit to 9.3 miles. They had a beautiful view of Earthrise as they came around to the Moon’s front side on the 14th orbit.
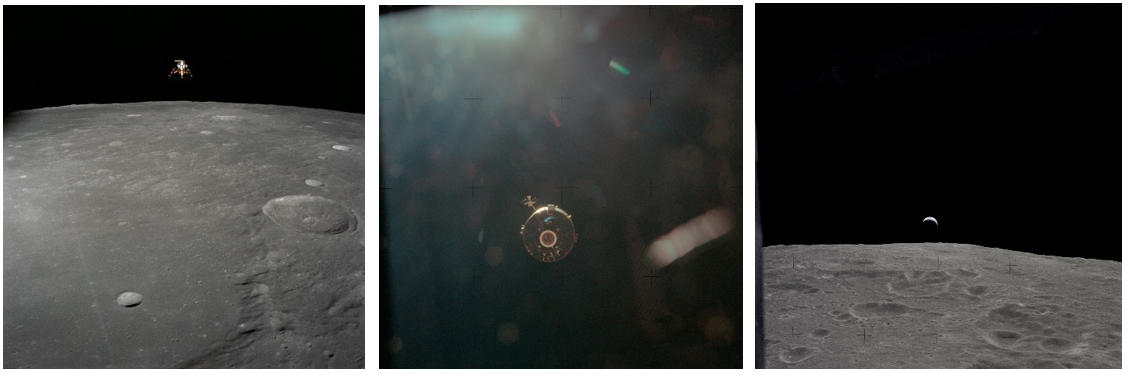
Left: Intrepid as seen from Yankee Clipper shortly after undocking. Middle: Yankee Clipper as seen from Intrepid shortly after undocking. Right: Earthrise as seen from Intrepid after the DOI burn.
In mission control, the Visitors Gallery began to fill with dignitaries, including NASA Administrator Thomas O. Paine and his wife Barbara, Deputy Administrator appointee George M. Low, Associate Administrator for Manned Space Flight George E. Mueller, Director of NASA Marshall Space Flight Center Werhner von Braun, and astronauts Neil A. Armstrong, Edwin E. “Buzz” Aldrin and Frank Borman. Exactly half a revolution after the DOI maneuver, Intrepid’s DPS began the 11-minute Powered Descent Initiation (PDI) burn to drop it from orbit all the way to the landing in the Ocean of Storms. At the start of the burn, Intrepid was 300 miles from the landing site, with the DPS engine initially at 10 percent thrust—then brought up to 93 percent thrust after 26 seconds. With Bean providing updates from the guidance computer, Conrad skillfully piloted Intrepid to a smooth landing just northwest of Surveyor Crater and, as they learned later, only 538 feet from Surveyor 3, a robotic spacecraft that had landed there in April 1967. Without much fanfare, Conrad and Bean completed the post-landing checklist, although Bean allowed himself a little exuberant, “Good landing, Pete! Outstanding, man! Beautiful!”
Conrad radioed to mission control, “OK, we’re in hot shape, Houston. We’re in real good shape!”
With the landing of Apollo 12, Conrad and Bean doubled the number of humans to have visited the Moon.
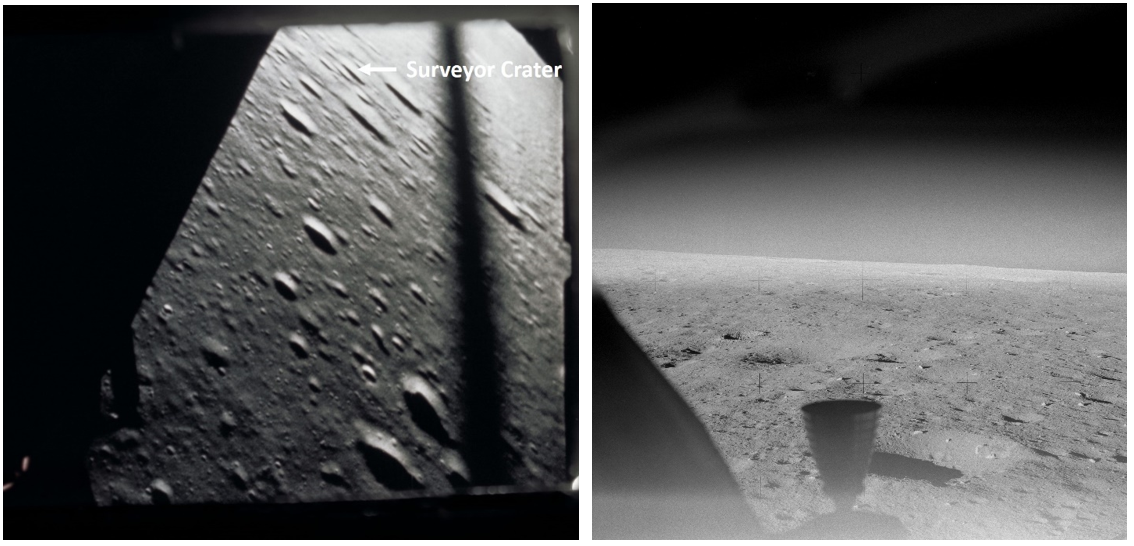
Left: Still from 16 mm film looking out from Bean’s LM window at about 3,500 feet altitude during the descent, showing location of Surveyor crater, the Apollo 12 landing site. Right: First photograph taken from the lunar surface by Apollo 12, showing one of the LM thrusters out Conrad’s window.
Four views of the Apollo 12 landing site taken shortly after landing through the LM’s windows—the first two through Conrad’s and the last two through Bean’s.
Gordon, who listened to the landing on the radio, called down to congratulate Conrad and Bean on the successful touchdown. Conrad remarked that their site appeared to be dustier than the Apollo 11 landing point, leading to an IFR (Instrument Flight Rules) landing—meaning that in the final stages he lost visibility and flew strictly by instruments. Capcom Gerald P. “Jerry” Carr radioed that since Intrepid’s systems were functioning normally, they were given the go to stay on the surface. But, as part of normal procedures, Conrad and Bean prepared for an emergency takeoff, just in case.
Once those activities were done, they had a chance to look out the windows, with Bean saying, “Holy cran, it’s beautiful out here!”
Conrad replied, “It sure is; it’s something else,” later adding, “Man! I can’t wait to get outside!”
They photographed the landing area from inside the LM and provided a description to eager geologists on the ground. The very low Sun angle made distinguishing detailed features difficult. Bean also remarked how they enjoyed the low-lunar one-sixth G, even in the confined quarters of the LM.
After grabbing a meal and powering down the LM to conserve power, Conrad and Bean began preparations for their first extravehicular activity (EVA), or surface spacewalk. During his next pass over the landing site on revolution 16, Gordon was able to spot Intrepid and Surveyor 3 on the surface using a 28-power sextant, providing an accurate description of the LM’s location northwest of Surveyor Crater.
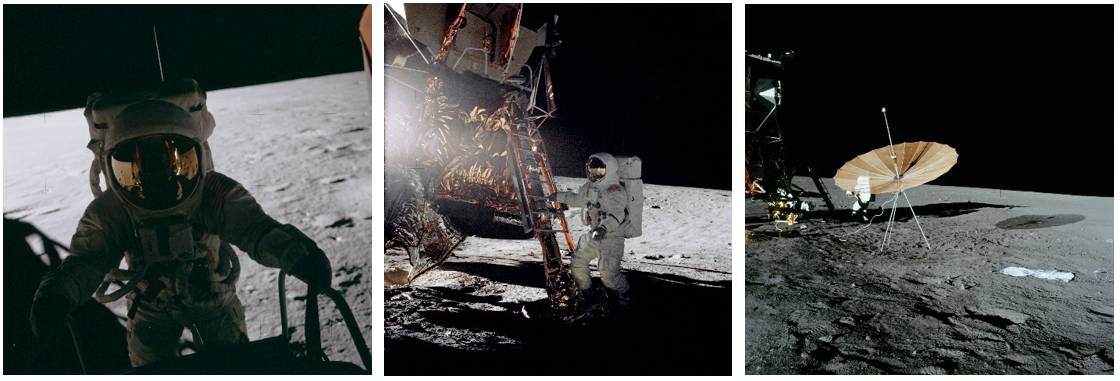
Left: Conrad on the LM’s ladder, about to descend to the surface, taken by Bean from inside Intrepid. Middle: Bean taking his first step on the Moon. Right: The S-band communications antenna.
Conrad and Bean donned their Portable Life Support System (PLSS) backpacks, which would provide oxygen and communications while they were on the surface, and put on and locked their helmets and gloves. They depressurized the LM, opened the hatch, and Conrad backed out onto the porch and slowly climbed down the ladder. Halfway down, he pulled a lanyard that deployed the Modular Equipment Stowage Assembly (MESA) on the side of the LM’s descent stage. Located on the MESA, a color TV camera automatically activated, giving viewers around the world an image of Conrad on the LM ladder.
After he jumped from the bottom rung onto the footpad, Conrad exclaimed, “Whoopie! Man, that may have been a small one for Neil, but that’s a long one for me,” in reference to Armstrong’s famous words as he took humanity’s first step on the lunar surface and Conrad’s shorter stature. As he stepped off the pad, he remarked, “Oooh, is that soft and queasy.”
After taking a few tentative steps, Conrad informed everyone that he could see Surveyor 3 sitting inside the crater. He then proceeded to collect the contingency sample. In the event the astronauts had to leave quickly due to an emergency, geologists would at least have a small sample from the Ocean of Storms.
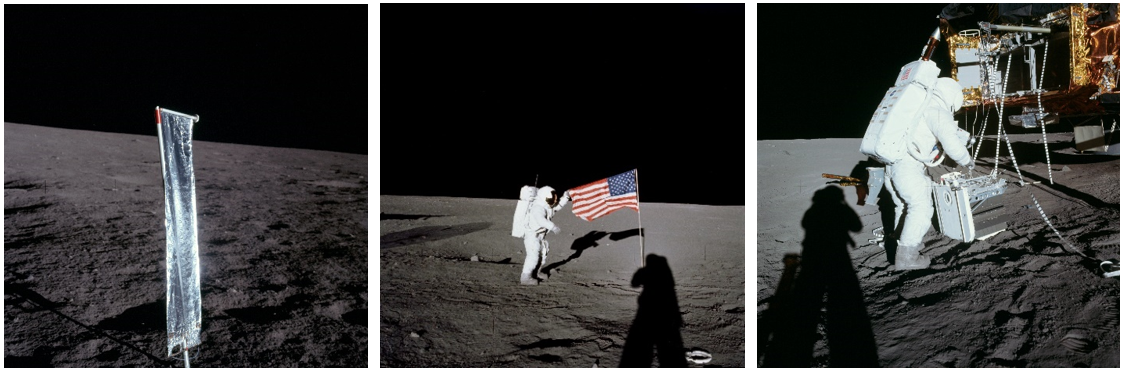
Left: The Solar Wind Collector experiment. Middle: Conrad holds the flag after he and Bean plant it on the surface. Right: Bean removes ALSEP hardware from the Scientific Equipment bay.
Bean joined Conrad on the surface, and they both acclimated rapidly to working in one-sixth G. Conrad set up the S-band antenna for communications with Earth but, while setting up the TV camera, Bean accidentally pointed it at the Sun and damaged the vidicon tube, ending the live TV transmission from the Moon. Bean deployed the Solar Wind Collector, a Swiss experiment that collected particles from solar wind. Conrad and Bean set up the American flag, but the horizontal crossbar meant to keep the flag unfurled didn’t latch, leaving the flag somewhat limp unless one of the astronauts held it up by a corner. Conrad took a series of panoramic photos while Bean photographed the LM, and then they began the primary task of the first spacewalk—setting up the various instruments of the Apollo Lunar Surface Experiment Package (ALSEP). The LM had carried the experiments to the Moon stowed in the Scientific Equipment bay, from where Conrad and Bean removed and carried them to their deployment location about 430 feet to the northwest of Intrepid.

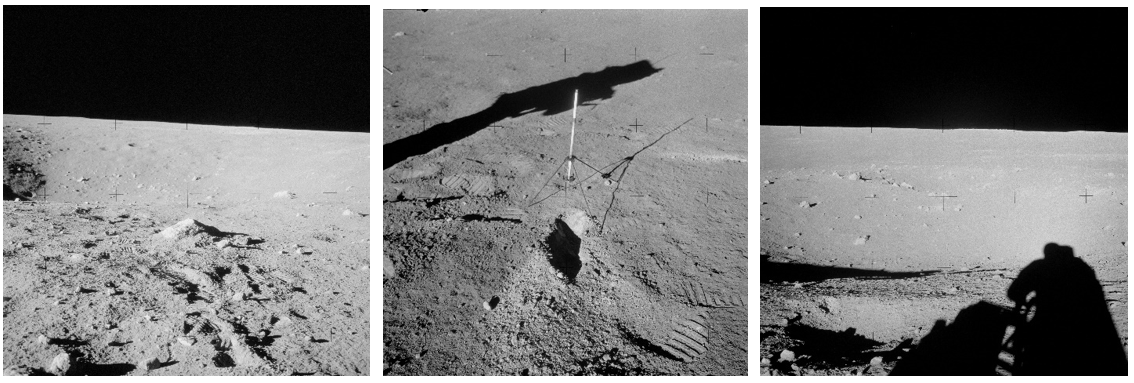
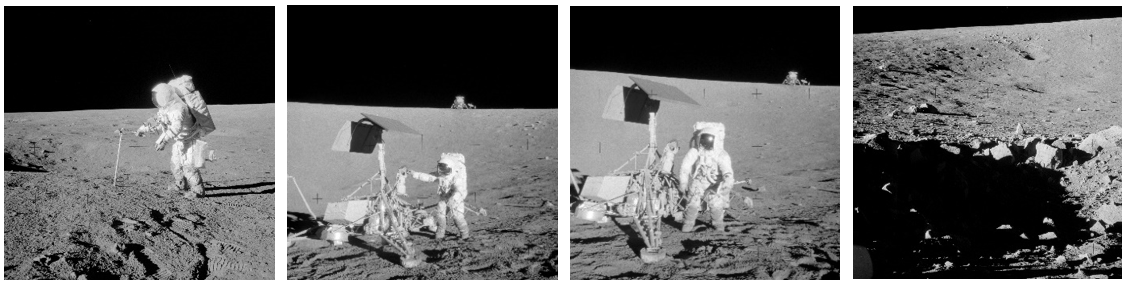
Left: Bean carrying the ALSEP hardware to its deployment location. Middle: Conrad working at the ALSEP Central Station with other experiments deployed. Right: ALSEP Central Station, with other deployed experiments and Intrepid in the background.
For the next hour, Bean and Conrad explored the area around the ALSEP site, in particular visiting and photographing Head Crater, a large mound of undetermined origin, and Middle Crescent Crater, a 1,000-foot diameter crater northwest of the ALSEP station and the furthest point of the EVA1 traverse.
Because their suit consumables remained adequate, mission control extended the spacewalk by 30 minutes, providing them extra time to explore and collect rock and soil samples before heading back to Intrepid. Back at the spacecraft, Bean collected a core sample, and they both loaded their specimens into a Sample Return Container (SRC), or rock box for transfer up to the cabin. They remarked on several occasions how the lunar dust clung to everything—their suits and equipment. As Conrad had quipped earlier during the spacewalk, “We’re going to be a couple of dirty boogers.” Lunar dust was a problem for all Apollo astronauts and will pose a challenge for future lunar explorers.
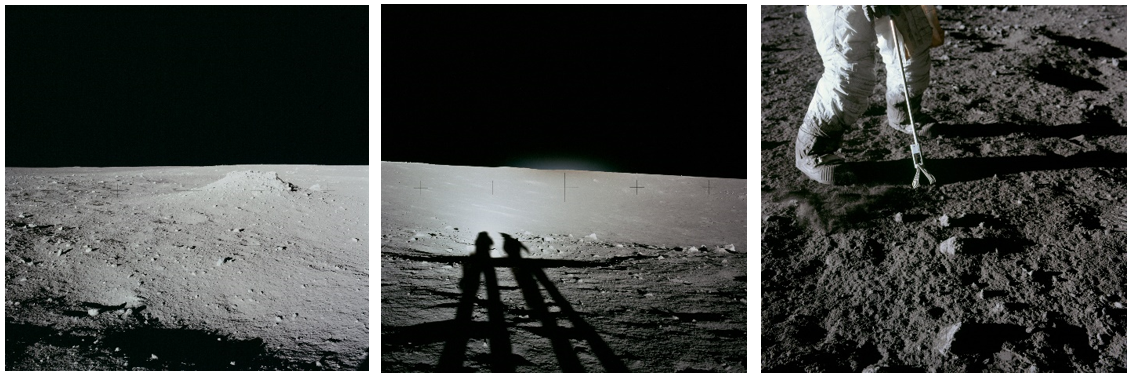
Left: Conrad’s photograph of the Large Mound northwest of Intrepid. Middle: Looking inside Middle Crescent Crater, with the astronauts’ shadows (Conrad on the left and Bean on the right). Right: Conrad about to collect a rock sample.
First, Bean climbed up the ladder after Conrad brushed as much dust from the suit as possible. Once inside, Bean kicked out a trash bag and worked with Conrad to haul up a camera bag and the filled SRC using a lanyard system. Conrad followed up the ladder, and once both crew members were inside Intrepid, they closed the hatch and repressurized the cabin. Their first spacewalk had lasted three hours and 56 minutes.
They then removed their helmets and gloves and began recharging their PLSS backpacks. Meanwhile, Gordon in Yankee Clipper performed a plane-change maneuver during revolution 19, the first time a solo crewmate completed a burn of the SPS. Because Yankee Clipper’s orbit precessed, or moved westward over time, the maneuver realigned it for the rendezvous with Intrepid the following day. Conrad and Bean, after a debrief of EVA1 with Capcom Edward G. Gibson, grabbed a quick dinner, set up hammocks in Intrepid and went to sleep.
After a short night’s rest, neither crew member getting more than four or five hours of sleep, Conrad and Bean prepared to go outside for their second excursion. Following a quick breakfast and a discussion with Gibson to review the plans for this traverse, they donned their helmets and gloves and depressurized Intrepid. Repeating the steps of the previous day, first Conrad and then Bean descended the ladder to the surface. As their first task, they cut the cable to the failed TV camera and placed it in a bag for return to Houston for postflight analysis. Next, Conrad walked to the ALSEP to inspect one of the instruments, his footsteps picked up by the seismometer they deployed during EVA1. Both then headed toward Head Crater to the west of Intrepid, where Conrad rolled two rocks down into the crater—the vibrations caused by this action captured by the seismometer. On the way to their next station, Bench Crater, they stopped briefly to photograph Triplet Craters, a series of three craters making a 90-foot formation.
 Images from EVA2. Left: Looking into Head Crater. Middle: A trench the astronauts dug to expose subsurface material. Right: Bean’s shadow in Triplet Craters.
At Bench Crater, they collected several documented samples, often preceded with expressions like “Oooooh!” and “That’s a beauty!” and dug a trench to expose subsurface material. Conrad declined a request from Gibson to climb down into the crater to collect some bedrock samples, as he considered the side too steep for safety. From Bench Crater they walked to the 36-foot wide Sharp Crater, the westernmost stop on their traverse. They dug a trench and collected a sample from about eight inches deep and placed it inside a Special Environmental Sample Container, which kept the sample in a pristine vacuum condition until it would be opened in the Lunar Receiving Lab in Houston after the mission. They also collected a core sample from inside the trench.
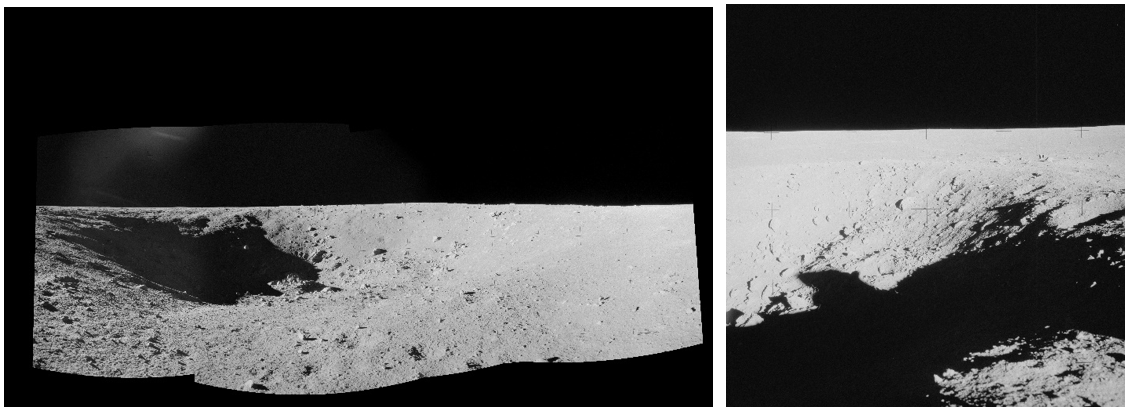
Left: Panoramic composite of Bench Crater. Right: Conrad on the edge of steep-rimmed Sharp Crater.
Skirting south of Bench Crater, the duo jogged 700 feet east toward Halo Crater, another 36-foot feature near the southwestern rim of Surveyor Crater. Bean took another core sample near Halo Crater, using a hammer to drive it home. And, like two tourists on vacation, Conrad and Bean posed for pictures. From there, they set off toward the main objective of EVA2—Surveyor 3—resting on the inner slope of 600-foot wide Surveyor Crater.
Entering the crater from the south rim, they walked counterclockwise while descending down the slope until they reached the robotic spacecraft. After taking “tourist” pictures with Surveyor, the two photographed the craft from all angles, noting that the trenches left by its scoop and the marks from its footpads when it bounced after landing looked as fresh as when Surveyor photographed them in 1967. Using cutters, Conrad removed the craft’s camera, scoop and other parts for stowage in Intrepid and its return to Earth, where engineers and scientists examined them to learn how 31 months in the harsh lunar environment affected the hardware. Their work at Surveyor completed, the two continued their counterclockwise trek around the crater back toward Intrepid, making a stop at the 30-foot wide Block Crater along the way to collect one more sample that likely included lunar bedrock.
Left: Bean hammering a core sample near Halo Crater. Middle left: Conrad with Surveyor 3. Middle right: Bean poses with Surveyor 3. Right: Block Crater, with Surveyor 3 and the astronauts’ tracks along the rim of Surveyor Crater in the background.
Conrad jogged ahead back to Intrepid to prepare the second SRC to load the rocks and other samples as Bean followed behind and helped transfer the samples. At one point, Conrad realized he was trying to blow dust off the SRC, forgetting he was wearing a helmet! Bean walked off to retrieve the Solar Wind Collector experiment, encountering some difficulties in rolling it back up. Compared with a short 77-minute exposure during Apollo 11, this Solar Wind Collector collected samples of the solar wind for nearly 19 hours.
With everything packed up, Bean headed up the ladder, with a mostly unsuccessful attempt by Conrad to brush off the clinging lunar dust. As they did at the end of EVA1, Conrad passed all the equipment that was destined to return with them up to Bean, and soon after he climbed the ladder, too.
Upon closing the hatch, they repressurized Intrepid, ending the three-hour, 49-minute EVA2. Once their EVA gloves and PLSS backpacks were removed, they depressurized the cabin and threw them out the hatch, with the seismometer registering their impacts with the ground. They repressurized Intrepid one last time and began to clean up the cabin. With some extra time and some film left over, they took photographs out the windows and began to prepare for the liftoff to rendezvous with Gordon in Yankee Clipper.

Left: Conrad back at Intrepid near the end of EVA2. Middle: Post EVA2 view from inside Intrepid through Conrad’s window. Right: Post EVA2 view from inside Intrepid through Bean’s window.
All image credits NASA.
To be continued …


